Tuesday 27 August 2013

Secure home network

Two things are vital to keeping your network safe: proper settings and prudence.
  • The first step is easy; you just need to adjust the settings on your router once.
  • The second step, however, takes more effort. Whenever you're online, you'll need to be prudent about your activities.
Here are some router and network settings tips that will help keep your home network safe.

Before I begin, note that with most routers you'll need to access the Web interface to change the settings. You can read Home router setup in this series for the full details. For Apple products, you can customize the applicable settings via the AirPort Utility, which is freely downloadable and included in Mac OS 10.7 or later.
Without a Web interface, Apple's routers trade flexibility and features for immunity to certain types of hacking. You still want to use the AirPort Utility to create strong Wi-Fi and log-in passwords however.
1. Encrypt your Wi-Fi network
Give your Wi-Fi network, identified by its SSID (a string of characters), a password so that (ideally) only those users you know and trust can connect to your network. This password should be hard to guess, but easy to remember and type - even on a small smartphone keyboard. The password should be at least eight characters long and should include both numbers and letters. And if your router lets you use passwords with spaces, that's even better.
  • Note that depending on the router, this password will be referred to in the Web interface as either the encryption key, the pass-key, the pre-shared key, or the passphrase.
  • You also need to consider which industry security standards your router supports.
2. Change important default settings

A router comes with many default settings. Since those are set by the vendor, they are public knowledge. Using the default settings may help make the setup process easier, but it also makes your router more susceptible to unauthorized access.

The two settings that you should change to keep your router safe are its default IP address and default log-in password.
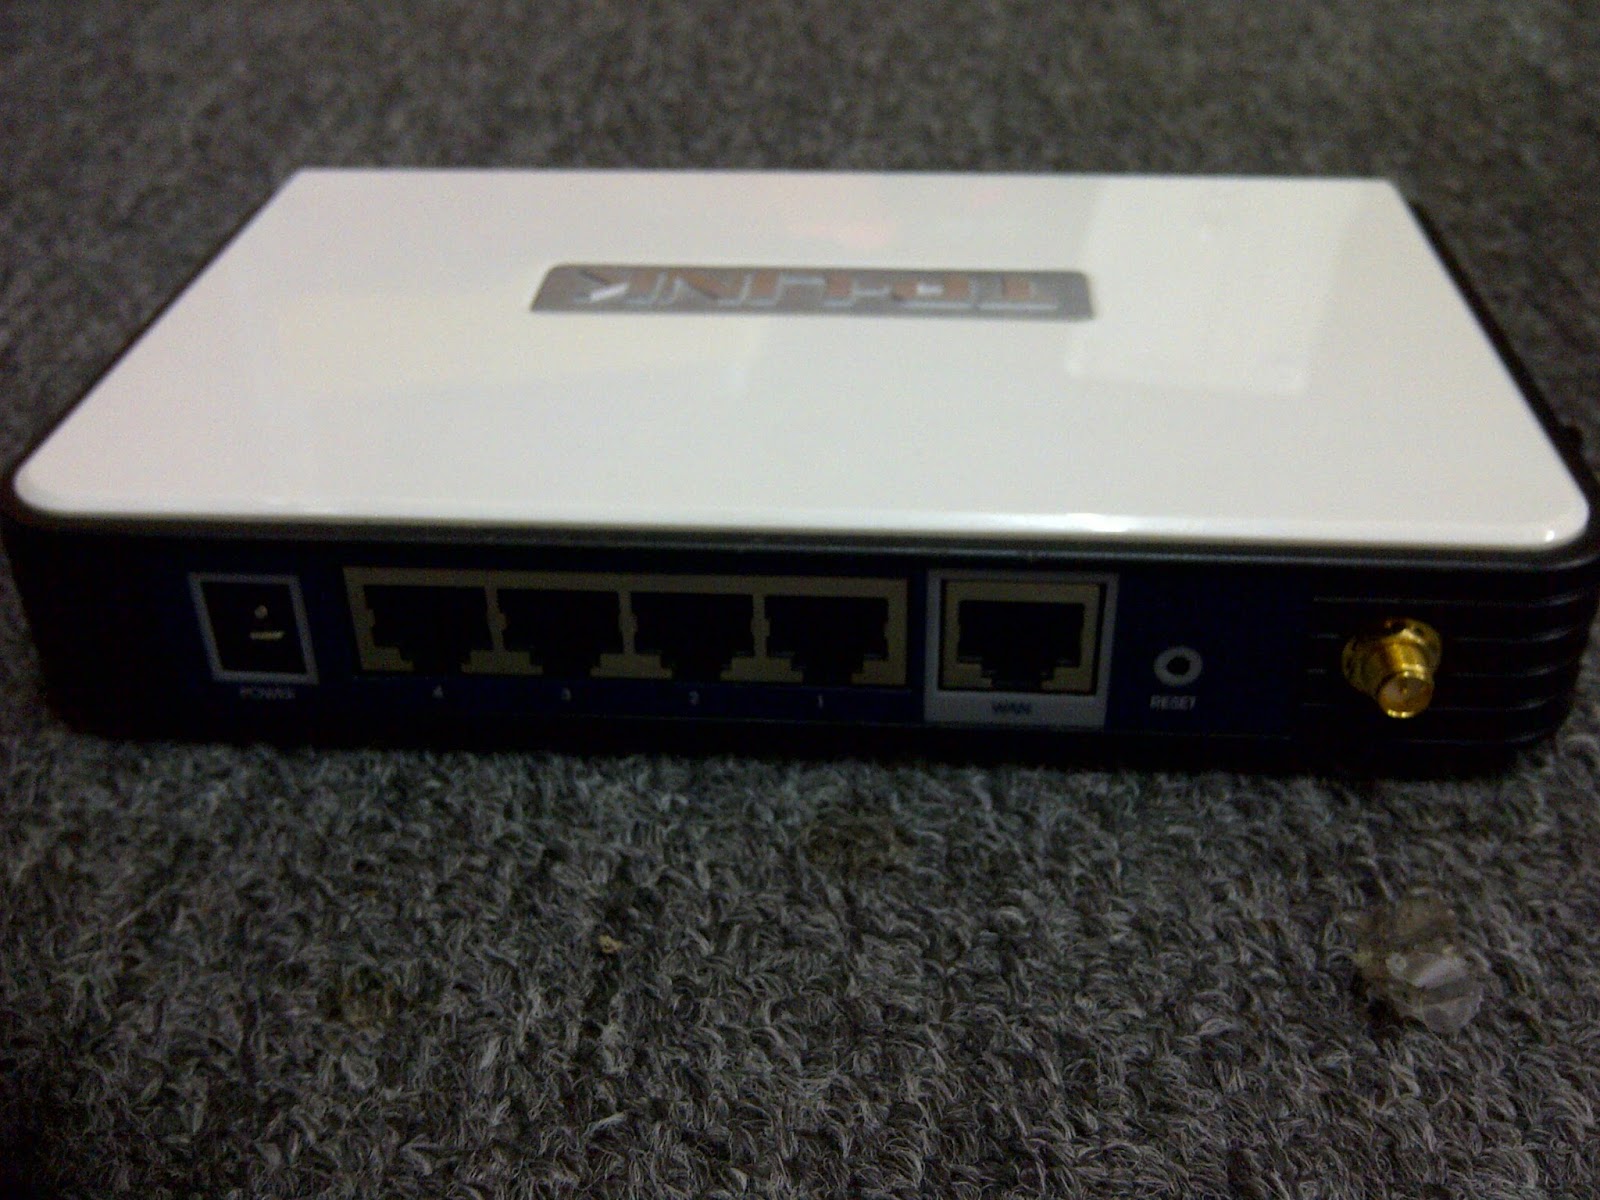
Making a strong router log-in password and turning off remote management and UPnP are a few ways to keep a router safer from intruders.

  • First, in the Local Area Network (or LAN) setup part of the interface, set the router's IP address. You can change it to almost anything you want as long as the value of each dotted-decimal notation (the numbers separated by the dots in the IP address) is a number from 1 to 254. So for example, instead of the conventional 192.168.x.1, you can make it 10.11.12.13 or 1.2.1.2 or 20.21.22.23 and so on.
  • Note that once you change the IP address, you'll need to use that new address to access the router's Web interface from then on. Also, avoid making the router's IP address the same as the IP assigned to your modem by your Internet service provider, called the WAN (wide-area network) IP address. ou can change the router's default log-in password via the Tools or Administration parts of the Web interface. 
    You can change the router's IP address to almost anything you want as long as the value of each dot-separated group is a number from 1 to 254. 
     
  • Make sure that this password is hard to guess and different from the password used for the Wi-Fi network mentioned above.
3. Turn off remote access-related features
  • Most routers are accessible over the Internet, so even when you're not at home you can remotely manage and use FTP (specifically for routers that come with a USB port to host an external hard drive for network storage)
  • Also, you should turn off the UPnP feature. It lets a UPnP-compatible device change certain router settings without logging in to the Web interface, and it could be exploited by hackers.
4. Update the router's firmware
  • Depending on the router, updating the firmware can take a few easy clicks, or you may have to first download the firmware and install it manually.
  • Typically, firmware updates from the manufacturer help improve a router's performance and security.
5. Log out properly
  • Make sure that you log out of the router's Web interface when you're finished making changes.
  • Some interfaces have a log-out button, but with others you'll need to close the browser too
Bonus step: Turn on power line adapters' security features
Another thing that can easily be overlooked: if you use power line adapters in your network, it's a good idea to turn on their security features. This is especially important if you live in an apartment building, as unscrupulous neighbors could tap into your network by using an adapter in their homes.

That's it! If you follow these steps, your router and your home network will be more secure. If  have questions on keeping your network safe, send them usway via Facebook or Google+ or just post them in the comments section below.


PakarPC No 23-1, Block A, No 2 Jalan Langkawi 53300 Setapak Kuala Lumpur FB:facebook.com/thepakarpc Hotline:1800-88-7508

Monday 26 August 2013

What is TELNET? What Does TELNET Do?

What is TELNET? What Does TELNET Do?

A terminal emulation program for TCP/IP networks such as the Internet.Telnet is an old computer protocol (set of programmatic rules). Telnet is famous for being the original Internet when the Net first launched in 1969. Telnet stands for 'telecommunications network' and was built to be form of remote control to manage mainframe computers from distant terminals. In those original days of large mainframe computers Telnet enabled research students and professors to 'log in' to the university mainframe from any terminal in the building. This remote log in saved researchers hours of walking each semester. While telnet pales in comparison to modern networking technology it was revolutionary in 1969 and Telnet helped pave the way for the eventual World Wide Web in 1989. While telnet technology is very old it is still in some use today by purists. Telnet has evolved into a new modern version of remote control called 'SSH'(Secure Shell Network Protocol) something that many modern network administrators use today to manage Linux and Unix computers from a distance.Telnet is a text-based computer protocol. Unlike Firefox or Google Chrome screens.Telnet screens are very dull to look at. Very different from Web pages that sport fancy images, animation and hyperlinks. Telnet is about typing on a keyboard. Telnet commands can be rather cryptic commands with example commands being 'z' and 'prompt% fg'. Most modern users would find Telnet screens to be very archaic and slow.


PakarPC No 23-1, Block A, No 2 Jalan Langkawi 53300 Setapak Kuala Lumpur FB:facebook.com/thepakarpc Hotline:1800-88-7508

Friday 23 August 2013

Home router setup


Most routers' Web interfaces are similar and self-explanatory

But it doesn't have to be if you understand the most common way routers are managed: through the Web interface. The hardest part of using the Web interface is getting to it. It might seem like a daunting task to set up a new home router

In this post, I'll talk about how you can quickly set up any router by accessing its Web interface and manage it from any connected computer or even a tablet or smartphone.

Let's start with the basics.

1. What is a browser?
As you surf the Internet, the address bar automatically displays the current address of the Web page you're looking at whether you typed in the URL or got to it by clicking on a link such as one from within an e-mail or from another Web page. All browsers have an address bar where you can type in the Web address of a Web site  such as. After that, you hit Enter and the browser will let you browse (hence the name) the content of the site

Among the most popular browsers are Google Chrome, Mozilla Firefox, Apple Safari, and Microsoft Internet Explorer. You'll find at least one of these browsers on any computer, tablet, or smartphone, and any of them can be used to manage a router's Web interface.


 2. Setting up the hardware
When you get a new router, setting up the hardware is very simple. (If this part of home networking is new to you, check out Wired Networking of this series first). All you need is a computer that has a network port (most computers do) and two network cables (a new router comes with at least one network cable). Follow these steps, regardless of what the router's included setup guide might say:

A). Connect the router's WAN port to your Internet source such as a DSL or cable modem using the first network cable. All home routers have just one WAN port (sometimes labeled the Internet port) this port is always separate from the other network ports and often is a different color to further differentiate it.

Note: If you do not have Internet access at home or want to have an isolated (non Internet-enabled) network, you can skip this step. Later on you can always complete this step when the Internet is available or needed.

B). Connect one of the router's LAN ports (most routers have four LAN ports) to the computer using the second network cable.

C). Plug the router into the power outlet using its power adapter as you would with most electronics. If the router has an on-off switch make sure the router is on. Many routers don't have this switch and will turn on as you plug it in.

That's it -- you have just finished the hardware setup.

3. Accessing the Web interface
The next step is to use the Web browser to display the router's Web interface. Basically, you will need two things: the router's URL which is always its default IP address and default log-in information. You'll find this information in the router's manual and sometimes it's printed on the underside of the router as well.

Most if not all home routers on the market have a default IP address in this format: 192.168.x.1, where depending on the vendor, x tends to be 0, 1, 2, 3, 10, or 11. For example, routers from Trendnet almost always have a default address of 192.168.10.1, while D-Link routers use 192.168.0.1 or 192.168.1.1.

And the log-in information is also quite predictable. The username (if any) is almost always admin and the password (if any) tends to be one of these: admin, password, default, or 1234.

Once you have gotten these two pieces of information, just type the router's IP address in the address bar of a browser on a connected computer, press Enter, and then enter the log-in information, after which you'll be greeted with the Web interface.

You can quickly find out the router's default address by using the ipconfig command on a Windows computer.

Also, from a connected computer, you can always find out what the current IP address is of the local network's router. This is helpful if a router's default IP address has been changed. On a Windows computer do this:

1. Run the command prompt (you can find it in the Start menu, or in Windows 8 just type cmd when you're at the Metro Start menu, then press Enter).
2. At the Command Prompt window, type in ipconfig then press Enter. You will see a lot of things, but the IP address following the Default Gateway is the address of the router

On a Mac, it's also quite easy to find out the default IP of the local network's router.

On a Mac: Click on the apple at the top left corner -> System Preferences -> Network -> Pick the current connected connection (it's likely the Ethernet) -> click on Advanced -> on the tab TCP/IP (first tab), the router's IP address is shown next to Router.

4. A new router's basic settings
Though the design of the Web interface is opened varies from one vendor to another, most of them have granular menus. Listed below are typical main menu items and what they do.

Wizard: You just have to go through and set up a few of the routers' settings, such as its log-in password (to be changed from the default -- you should definitely do this to keep your network secure) and the name and password for the Wi-Fi network (or networks, for dual-band routers). Many routers' interfaces show the wizard when the Web interface is accessed for the first time.

It's a good practice to save the router's current settings before making changes.
Setup section:
Wireless (or Wireless settings): Where you can customize the router's Wi-Fi network(s). You can pick the name of the network, change the password, turn the Wi-Fi Protected Setup feature on or off, and a lot more.
WAN (or Internet): Most of the time you should use the Auto setting for this section. However, some ISPs might require special settings; in those cases you can enter them here.
LAN (or Network settings): This is where you can change the local network settings, including the default IP address of the router itself. (Note that if you change the router's default IP address, which is recommended for security reason, you'll then need to use the new address to access the router's Web interface.) Here you can also change the range of IP addresses used for local clients, and add clients to the DHCP Reservation list. Once on this list, the clients' IP addresses will remain the same, which is required for some Internet applications. Most of the time, you don't need to change anything in this section at all.

Tools (or Administration) section:

Admin password (or Password): Change the router's password. This is the password required when you log in the router's Web interface.

System: Where you can back up the current settings of the router to a file, or restore settings from a file; update the router's firmware; and so on. It's always helpful to back up the router's settings before you make changes.
You'll find a lot more settings and features on a router's Web interface, and when have time, you should try them out. If worst comes to worst, you can turn to the last-resort step below to restore the router to its default settings.

5. The last resort
All routers come with a reset button. This is a tiny recessed button that can be found on the bottom or side of the device. Using something pointy, such as an unfolded paper clip, to press and hold this button for about 10 seconds (when the router is plugged into power) will bring its settings back to the factory default.

That's it for now. If you haven't found your questions answered, send them to us via Facebook, or Google+, or just post them in the comments section below.


PakarPC No 23-1, Block A, No 2 Jalan Langkawi 53300 Setapak Kuala Lumpur FB:facebook.com/thepakarpc Hotline:1800-88-7508

Tuesday 20 August 2013

Wi-Fi vs Internet

This is the Internet as it should be known.  

Wi-Fi: As mentioned in Wired Networking of this series, Wi-Fi is just an alternative to network cables as the way to connect devices of a local area network (LAN). By the way, most networking terms used in this post have been explained in Wired Networking; others will be explained here. Prior to Wi-Fi the only way to connect devices together was to run the physical network cables between them, which is very inconvenient.

The owner is in total control of the Wi-Fi network. He or she can change the name of the network, the password, the number of connected clients, allowing them to exchange data with one another or not, and so on.

This means involved devices can always work with one another to provide data sharing, printing, local media streaming, local network backups, and so on.

To connect a home Wi-Fi network to the Internet, the router needs to be connected to an Internet source, such as a broadband modem, via its WAN port. When this happens, the Wi-Fi signal of the local network will also provide the connection to the Internet for its connected clients. So Wi-Fi is just one way to bring the Internet to a device.

Internet: Generally known as the wide area network (WAN), the Internet connects computers from around the world together. In reality, as far as the current state of how the World Wide Web is run, the Internet actually connects many local networks together, via many routers

The Internet's speed has progressively increased in the last decade. The most they can do is pay for the desired connection speed and hope that they get what they pay for

For a Wi-Fi network, the speed of the local network depends on the standards used by the Wi-Fi router (access point) and the connected clients, and can sometimes be slower than a fast broadband Internet connection.

Types of broadband Internet connections
  • Wired Internet (residential broadband): This is when you connect to the Internet using a physical cable, be it a telephone line (DSL) or a cable line (cable), or a fiber optic line (FIOS)
  • Satellite Internet (satellite broadband): This is similar to the wired Internet but instead of connecting to the service provide via a cable, the home network connects to a satellite disk on the roof.
  • Cellular Internet (wireless broadband): Cellular Internet uses the cell phone signal to carry data and connect the supported device directly to the Internet.
  • Cellular Internet is generally expensive because it tends to come with very low monthly data caps (about 5GB or less) and customers have to pay more than the fixed monthly cost when they go over the allowance. This type of Internet access is very popular with mobile devices, including smartphones and tablets.
The Verizon version of the new iPad offers the Personal Hotspot feature, which enables users to share the tablet's 4G connection with other Wi-Fi devices.

The combination of Wi-Fi and Internet 
If you have a laptop, such as the MacBook Air, the best way to connect it to the Internet is via Wi-Fi since the machine doesn't come with a built-in network port, nor does it support a cellular connection. At home or at the office, this can be done via a Wi-Fi-enabled router that connects to a residential broadband Internet connection. When you're on the go, however, you can't bring the router or especially the residential broadband Internet connection with you.

This is a little device that connects to the Internet using a cellular connection and then shares that connection via its own built-in Wi-Fi network. As mentioned above, the prime example of the combination of Internet and Wi-Fi is a mobile hot spot, such as those on this list.

A mobile hot spot lets more than one Wi-Fi-enabled device to share a single cellular connection.

PakarPC No 23-1, Block A, No 2 Jalan Langkawi 53300 Setapak Kuala Lumpur FB:facebook.com/thepakarpc Hotline:1800-88-7508

How to Find the MAC Address of Your Computer

---> Introduction to MAC ADDRESS


*** How to Find the MAC Address of Your Computer

Here have few steps to get the MAC Address form Your Computer

STEPS :

-> Using WINDOWS VISTA,7 or 8 :

1.Connect to a network. This method is only applicable if you are currently connected. Make sure to connect with the interface that you need the MAC Address for (Wi-Fi is you you are your wireless card’s MAC address, Ethernet if you need your wired card’s MAC address).


2.Click on the connection icon at the system tray. It may look like a small graphic (like the image below) or like a tiny computer monitor.then click on select "Open Network and Sharing Center".


3.Find the name of your network connection and click on it. It will be located right after the word Connections. This will open a small window.


4.Click on the Details it will open a list of configuration information about the connection, similar to what appears when you use the IPConfig tool in the Command  Prompt.


5.Look for Physical Address it is your MAC Address.


OR


1. Go to START Type "CMD".


2. Click on The "COMMAND PROMPT".it will be appear.


3.At the command prompt, type "ipconfig /all" and press Enter. This will display configuration information for all of your network connections.


4.Look for Physical Address. This is another way to describe your MAC Address. Make sure you get the PHYSICAL Address of the correct network adapter - usually there are several listed. For example, your wireless connection will have a different MAC Address than your Ethernet connection.


How to Find the MAC Address of Your Phone )

*** Using ANDROID OS

*** Using WINDOWS Phone.


PakarPC No 23-1, Block A, No 2 Jalan Langkawi 53300 Setapak Kuala Lumpur FB:facebook.com/thepakarpc Hotline:1800-88-7508

Introduction to MAC Address

---> Introduction to MAC ADDRESS
In computer networking, the Media Access Control (MAC) Address is every bit as important as an IP address. Learn in this article how MAC addresses work and how to find the MAC addresses being used by a computer.


WHAT IS THE MAC ADDRESS?


The MAC address is a unique value associated with a network adapter. MAC addresses are also known as hardware addresses or physical addresses. They uniquely identify an adapter on a LAN(LOCAL AREA NETWORK).MAC Addresses are 12-digit hexadecimal numbers (48 bits in length). By convention, MAC addresses are usually written in one of the following formats like this(MM:MM:MM:SS:SS:SS)

The first half of a MAC address contains the ID number of the adapter manufacturer. These IDs are regulated by an Internet standards body (see sidebar). The second half of a MAC address represents the serial number assigned to the adapter by the manufacturer. 

Exp :
  00:A0:C9:14:C8:29

The prefix : 00A0C9

indicates the manufacturer is Intel Corporation.


WHY MAC ADDRESS IS IMPORTANT?

Recall that TCP/IP (TRANSMISSION CONTROL PROTOCOL/INTERNET PROTOCOL) and other mainstream networking architectures generally adopt the OSI model (OPEN SYSTEM INTERCONNECTION MODEL). In this model, network functionality is subdivided into layers. MAC Addresses function at the data link layer (is a layer 2 in the OSI model). They allow computers to uniquely identify themselves on a network at this relatively low level.


MAC ADDRESS VS IP ADDRESS

Whereas MAC Addressing works at the data link layer(LAYER 2) and IP Addressing functions at the network layer (LAYER 3). It is a slight oversimplification but one can think of IP Addressing as supporting the software implementation and MAC addresses as supporting the hardware implementation of the network stack. The MAC Address generally remains fixed and follows the network device but the IP Address changes as the network device moves from one network to another IP  networks maintain a mapping between the IP Address of a device and its MAC Address. This mapping is known as the ARP cache or ARP table. ARP(the Address Resolution Protocol)supports the logic for obtaining this mapping and keeping the cache up to date. DHCP(DYNAMIC HOST CONFIGURATION PROTOCOL) also usually relies on MAC Addresses to manage the unique assignment of IP Addresses to devices.


*** How to Find the MAC Address of Your Computer

*** How to Find the MAC Address of Your Phone


PakarPC No 23-1, Block A, No 2 Jalan Langkawi 53300 Setapak Kuala Lumpur FB:facebook.com/thepakarpc Hotline:1800-88-7508

Taking control of wires

All home networks start with a network cable. Even if you plan on using all wireless clients, in most cases you will still need at least one cable to connect the wireless router and the broadband modem. A typical home network needs more than that because chances are you also want to connect a few Ethernet-ready devices to the router.

Knowing how to make your own networking cable is an important, handy skill for a few reasons. First, network cables that you buy at the store are generally grossly overpriced: a 7-foot-long cable can run. Secondly, it's hard to find a ready-made cable that's just the perfect length; most of the time it's either too long or too short. When you make your own, the cable will be exactly the length you want, and if it's not, well, you can make another one or adjust it.

You can also make other hardware parts for the network, including network wall ports and patch panels. As you will see after reading this post, this is a skill that's not only easy to learn, but it doesn't cost much, either.

The biggest return on this investment, however, is that you may find making and wiring your own network hardware actually fun, and it gives you complete control of your home network. A well-designed wired home network is also the best in terms of performance, since, for right now cabling is much faster and more reliable than a Wi-Fi signal. If you want to do serious streaming and data sharing within the local network, running network cables is the way to go.

Now, let's start with the cable itself.
This is more than you need to make or adjust the length of a network cable. Note that I cut off one of the connectors from the ready-made cable; there's a bag full of connector heads that are eagerly waiting to be the replacement.

1. Making your own network cable
A network cable basically consists of a patch cable and two network connectors (formally known as RJ45 modular plugs) attached to each of its ends. The job of making your own cable is attaching these connectors to a patch cable.
Here are the steps to make own network cable. The wiring scheme is the hardest part

The steps:
a. Use the tool to strip the patch cable's jacket about 1.5 inch from one end; you'll find eight color-coded wires (twisted into four pairs) that you'll need to arrange in a particular scheme. (In my experience, it's easier to spread these wires out and put them in the right scheme when you strip more than 1.5 inches of jacket. Later on you can cut the wires shorter if need be.)

b. Despite the small sizes of the parts involved, the plug has pin grooves on the inside to accommodate the wires, and the tiny size means that the wires can't easily go to wrong pins as long as they are properly aligned coming in. Check to make sure the wires go into the plug in the right order.

c. Insert the plug (with the wires now inside) into the crimp slot of the tool and crimp it.

Repeat the same step with another plug on the other end of the patch cable, and you have made yourself a network CAT5e cable.

2. Wiring a wall network port
As you might imagine, it's not a good idea to run a long cable from the router (in the living room) all the way to a home office, with, say, the kitchen in between.
Instead, it's better to make two wall network ports, one at the router and the other in the office.

In this post, though, I'm just talking about how you can make an Ethernet jack, with the ends of the patch cable already sticking out of the wall.

Depending on your home, the actual job of running patch cables behind the wall or under the house, and making both of its ends come out of the wall, can be tricky.
A good punch-down tool is essential to making your own network port.
The steps:
a. You can strip more than 2 inches if needed, since the extra length will be cut off, but note that there's a limited amount of patch cable coming out of the wall so you don't want to cut it too short.

b.Place the cable in the middle of the jack and push its wires on the pins of the matching color for the 568B standard. This means that the orange wire goes into the orange pin, the blue wire goes into the blue pin, and so on..

c. Use the punch-down tool to punch these wires down on their pin in one quick motion. If you do it right, the wire will be punched down, and the excessive wires will be cut off.
Wiring an Ethernet jack is actually much easier than making a network connector, since you don't have to remember the wiring scheme; instead just match the colors of the wiring and the pins 

3. Wiring a patch panel.
If you want to have a wired network with many wall network ports coming out in different rooms of the house, it's best to use a patch panel at the central location where the router/switch and/or the home server is. A network patch panel is basically a collection of many wall ports on one panel, with each of the ports connected via a patch cable to another port elsewhere in the house. This allows for easy management of the wired network and better organization.
Wiring a patch panel is very similar to wiring a network wall port.

In a way, the patch panel is just a bunch of network jacks bundled into one. You can find a patch panel with anywhere from 8 ports to 24 ports or even more, and you can also use multiple patch panels together to make a bigger one. Generally, you want to have a patch panel that offers the same number of ports as the total number used in the entire home or office.

Wiring a patch panel is exactly the same as wiring an Ethernet jack; you just need to do that multiple times for multiple ports.

Note that a patch panel is more of a convenience than a necessity. You can always just turn patch cables coming to the central place into network connectors (mentioned in the first part of this post) and connect them directly into a switch or router.

That's it for now; if you have questions, put them in the comment section below or send it us way via e-mail or at us Facebook page.


PakarPC No 23-1, Block A, No 2 Jalan Langkawi 53300 Setapak Kuala Lumpur FB:facebook.com/thepakarpc Hotline:1800-88-7508

Optimizing your Wi-Fi network

The top of the fireplace in the living room is a good spot to leave your Wi-Fi router for best coverage.

There are a few ways to make sure you get the best out of your Wi-Fi network. With some, you just need to do a little bit of tweaking; with others, depending on your home, you might need to get extra equipment.

Let's start with the ways that probably won't cost you anything, other than a little bit of time.

1. Placement
Location: This globe, however, is not exactly spherical; one of the reasons is because the signals are generally turned to go out more horizontally than vertically and like all radio signals, they tend to spread laterally and downward the farther they are from the broadcaster.A wireless router (from here on in this post, it will be addressed as "router" for short) broadcasts Wi-Fi signals away from it in all directions.Think of the signal coverage as a globe with the router being right in the center.

To take advantage of this, use the telephone jack (or coax cable outlet) at or near the center of the house, preferably on the upper floor when applicable, to connect to your modem and then your router..

Surroundings: Since it's not possible to have that indoors, you can improve the signal a great deal by making sure the immediate surroundings of the router/modem are clear, especially in the directions you want the signals to reach.The best place to leave the router is in midair, but since that's quite hard to do, the second best thing is to put it on the surface of a desk, or mount it on the wall when applicable.

Antenna positioning: Generally you want the antennas to stay vertical if you want the signal to go wide (which is the most popular usage). If want the signal to go deep into the basement and up to the top floor, set the antennas to stay horizontal. With a router that comes with external antennas, you can slightly tweak the above-mentioned globe of coverage. Note that this only works relatively, and with some routers, you might not experience any difference at all whichever way you set its antennas.

 2. Equipment
Now that you have placed your router properly and still don't find enough improvement, it's time to check the equipment. Get ready to spend some money.

Router: Ideally you just want to have one wireless broadcaster at home and for most homes, a single router is good enough. That said, if you have a small house and the router (put in the middle) can't cover every corner, it's time to consider replacing it.
Many wireless router can also work as an access point. In this case its WAN port is used like a LAN port.

Access point: A separate access point is an ideal solution for a large and sprawling home, one that you can't put the router in the center, or one with a deep basement, with an existing router. Basically, you want to put the second access point at the location where the signal of the existing router can't reach or gets really weak.

Now the trick is to connect the access point to the router. Ideally, you want to run a network cable from the router to the access point (you want to connect the access point's LAN port to one of the router's LAN ports). If this is too much of a job, you can resort to power-line networking.

Power line: A power-line adapter basically turns your home's electrical wiring into network cables. In the case of the separate access point scenario above, you can use a pair of power-line adapters, such as the D-Link DHP-510AV. Connect one of the adapters to the router and the other to the access point, using network cables. After that, if you want to make your home network seamless, name the Wi-Fi network (or SSID) of the access point the same as that of the existing router. In this case, make sure you use the same security settings (encryption key, method, and so on). Or you can also keep them as two separate Wi-Fi networks for easy management.

There are also power-line adapter kits with a built-in access point, called power-line range extenders, such as the Netgear XAVNB2001. In this case, you don't need to get the second access point/router.

In addition to power line, you can also opt for a pair of MoCA adapters. MoCA stands for Multimedia over Coax Alliance, and similar to power line, turns coax cables (those used by cable TV) into network cables. MoCA adapters are great solutions for homes with multiple cable outlets in different rooms.

Range extender/repeater: These are wireless devices that can connect to an existing Wi-Fi network and then rebroadcast that same network's signal farther. Most of these devices support Wi-Fi Protected Setup and can connect to the existing router with the push of a button; after that, you can just put one at the edge of the existing network's Wi-Fi range and have that range increased.

I am not a fan of this type of device because of a few reasons:

First, it's hard to gauge their effectiveness; you need to put a range extender/repeater relatively close to the existing router for it to have a good connection with the main network, but at the same time far enough for it to really extend the range. It's very hard to find the sweet spot for it to be effective both in terms of range and connection quality.

Second, the repeater basically duplicates the existing Wi-Fi network with one of its own, and as mentioned above, Wi-Fi signals are broadcast in all directions. This means devices in the area where the two networks overlap have to deal with interference and signal saturation. This is especially bad for the 2.4Ghz band.

That said, a range extender/repeater is still the fastest way to relatively extend a Wi-Fi network's coverage.
You can easily find out a home network router's IP address by running the ipconfig command from any connected computer.
3. Settings
One of the problems with Wi-Fi networks is the risk of losing your bandwidth to unauthorized users. This part helps you secure your network and optimize it for speed. Note that it's slightly more advanced and might seem intimidating to novice users. But you will be a novice no more if you go through with it. This part is only recommended for those interested in learning more about networking.

With the exception of networking products from Apple, most, if not all, other routers and access points on the market comes with a Web interface. This means that from a connected computer, you can open up the router's management Web page by going to its IP address. Unless you have changed it, the default IP address is generally printed on the bottom of the router, or on its user guide, and tends to be in this format: 192.168.x.1.

It's easy to find out your router's IP address; here are the common steps to get to any home network's router's Web interface:

Step 1: From a connected computer (running Windows Vista or 7), click on Start button, type "cmd" in the search area, then press Enter. (If you use Windows XP, you can navigate the Start Menu and run the Command Prompt item.)

Step 2: Now in the black command prompt window, type in "ipconfig," then press Enter. You will see lots of information displayed in the window. Find the string of number after Default Gateway, that's the router's IP address.

Step 3: Type that IP address in the address bar of a browser, such as Firefox, and press Enter; now you are at the router's Web interface. You will have to log in with an account. The username is almost always admin; for the password, check the router's manual or ask the person who first set up the network for you.
The Web interface offers a convenient and extensive way to manage a router's or access point's settings.

On the Web interface, the following wireless settings will help your network stay safe:

Network name and password: Most if not all routers come with a default Wi-Fi network name (or SSID) and password; you won't want to use those. This is mostly because that reveals to advanced users which router you have and that, well, you don't know much about networking. Changing the SSID and password to your liking also helps you remember them better.

Hide your SSID: By default all routers broadcast the Wi-Fi network name. This makes it convenient since clients can "see" them. Hiding the SSID makes your Wi-Fi network invisible to others. The only drawback is that you have to manually type it in when you want to connect a new client to it. There's a trick for it: turn the SSID on briefly when you want to connect a new client, once that's done, hide it again.

Use WPA 2: Using the WPA 2 encryption method helps both increase the security and the speed of the Wi-Fi signal. The only catch is that WPA 2 might not be compatible with older clients. Most new clients released in the past few years support WPA 2, however. You can try using WPA 2 first and if some of your clients are unable to connect, switch it back to WPA.

In addition, once you have accessed the router's Web interface, there are many other settings that you can try. For safety, there are also MAC address filters, Internet filtering, and so on. Note that a router generally takes about a minute to restart to apply new settings.

That's it for now; if you have more questions, put them in the comment section below or send it us way via e-mail or at us Facebook page.


PakarPC No 23-1, Block A, No 2 Jalan Langkawi 53300 Setapak Kuala Lumpur FB:facebook.com/thepakarpc Hotline:1800-88-7508

Monday 12 August 2013

Wired Networking

 A typical wireless router with LAN ports for Ethernet-ready devices and antennas for Wi-Fi clients.

Wired networking
A wired local network is basically a group of devices connected to one another using network cables, more often than not, with the help of a router, which brings us to the very first networking term.

Router: This is the central device of a home network that you can plug one end of a network cable into. The other end of the cable goes into a networking device that has a network port. If you want to add more network devices to a router, you'll need more cables and more ports on the router. These ports, both on the router and on the end devices, are called Local Area Network (LAN) ports. They are also known as RJ45 ports. The moment you plug a device into a router, you have yourself a wired network. Networking devices that come with an RJ45 network port are called Ethernet-ready devices. More on this below.

The back of a typical router; the WAN port is clearly distinguished from the LANs.

LAN ports: In other words, it takes about a minute to transfer a CD's worth of data (around 700MB or about 250 digital songs) over an Ethernet connection. In real life, the average speed of an Ethernet connection is about 8MBps, and of a Gigabit Ethernet connection is somewhere between 45 and 80MBps. There are currently two main speed standards for LAN ports: Ethernet, which caps at 100Mbps (or about 13MBps), and Gigabit Ethernet, which caps at 1Gbps (or about 125MBps). A home router usually has four LAN ports, meaning that out of the box it can host a network of up to four wired networking devices. If you want to have a larger network, you will need to resort to a switch (or a hub), which adds more LAN ports to the router.

In short, LAN ports on a router allow Ethernet-ready devices to connect to one another and share data.

 A typical CAT5e network cable

Switch vs. hub: This means the more clients you connect to a hub, the slower the data rate gets, whereas with a switch the speed doesn't change according to the number of connected clients. The main difference between hubs and switches is a hub uses one shared channel for all of its ports, while a switch has a dedicated channel for each of its ports.

Hubs are somewhat obsolete now since the price of switches has come down significantly in the last few years.

You can find a switch with just four or up to 24 ports (or even more). Note that the total of extra wired clients you can add to a network is equal to the switch's total number of ports minus one. This is because you need to use one of the ports to connect the switch itself to the network, which, by the way, also uses another existing network port

WAN port: Generally, a router has just one WAN port. (Some business routers come with dual WAN ports, so one can use two separate Internet services at a time.) A WAN port is exactly the same as a LAN port, just with a different usage: to connect to an Internet source, such as a broadband modem. On any router, the WAN port is always separate from the LAN ports, and often comes in a different color to distinguish itself.

Broadband modem: Generally, a modem has one LAN port (to connect to a router's WAN port, or to a Ethernet-ready device) and one service-related port, such as a telephone port (DSL modems) or a Coaxial port (Cable modems), that connects to the service line. Often called a DSL modem or cable modem, a broadband modem is a device that bridges the Internet connection from a service provider to a computer or to a router, making the Internet available to consumers

Network cables:
CAT5e and CAT6 cables can be used interchangeably and in my personal experience are basically the same, except CAT6 is more expensive. Currently, most, if not all, CAT5 cables on the market are actually CAT5e, which is capable of delivering Gigabit Ethernet data speeds. The latest network cabling standard currently in use is CAT6, which is designed to be faster and more reliable than CAT5e.


PakarPC No 23-1, Block A, No 2 Jalan Langkawi 53300 Setapak Kuala Lumpur FB:facebook.com/thepakarpc Hotline:1800-88-7508

Monday 5 August 2013

SCREEN CAPTURE SOFTWARE

SCREEN CAPTURE SOFTWARE?

Before this we used to capture the screen or print screen  lot of software now introduction a easy software.Name PICPiCK...before this we used print screen or snipping tool and etc.now us PICPICK PORTABLE it is very easy and usefully.


WHAT IS PICPICK PORTABLE?

PicPick program gives users a multi-featured capture tool,photo editor,color chooser,color list,a pixel-measuring tool a whiteboard feature and a cross hair  feature.


>>> FEATURES 


  • Screen Capture : Take screenshots of the entire screen, an active window, specific region of the screen, free hand, scrolling window and more. Auto-scroll, dual monitors and sound effect are supported.
  • Image Editor : Intuitive User Interface (Windows 7 Ribbon style). Standard drawing, shapes, arrows, lines, text, and etc. Effects are supported as well. Blur, sharpen, hue, contrast, brightness, color balance, pix-elate, rotate, flip, frame effect and more.
  • Color Picker and Color Palette : Various color code type (RGB, HTML, C++, Delphi). Photoshop style RGB/HSV conversion is supported. Pick and Save your favorite color.
  • Screen Pixel Ruler : horizontal and vertical orientation. various units (Pixels, Inches, Centimeters). DPI setting (72, 96, 120, 300).
  • Screen Magnifier : Zoom 2x to 10x option. Stay on top, smooth display, and sizable window.
  • Screen Protractor : Helps you find angles on screen. Pick a center, then a location, then the angle in degrees away from the first. Can be used in a variety of photography, math, and graphics applications.
  • Screen Cross-hair : For aligning objects in graphics or design applications. For calculating relative coordinates on screen.
  • Whiteboard : For giving a presentation or just drawing something on screen


PakarPC No 23-1, Block A, No 2 Jalan Langkawi 53300 Setapak Kuala Lumpur FB:facebook.com/thepakarpc Hotline:1800-88-7508

Friday 2 August 2013

How to Delete your Usage History Tracks in Windows???

How to Delete your Usage History Tracks in Windows?

the website you visit or view.after you close also is still is there(URL) so other person came and visit that page.if you want delete permanent how it is and what is the steps.here the steps how you can delete your browsing history for easy...

>>> Deleting Usage History Using Internet Explorer
      1.Open Internet Explorer. Click on Internet Options in the Tools menu.


      2.Delete everything. Bring up Internet Options from the Tools menu, then select "Delete all." Alternatively > delete individual items using the History Pane accessible from the toolbar button.


***Delete cookies: In the same Internet Options window, select Delete Cookies. Alternatively, delete individual items accessible using the View Files button.

 ***Delete temp files: In the same Internet Options window, select "Delete Files." See Tips for how to manage temporary files.


>>> Deleting Usage History Using Google Chrome

1.Open a Chrome browser window. On the upper right of the toolbar, locate and click on the Chrome     menu.


2.Check your options. In the resulting window, check off the options that you want to use. You can delete as little or as much of your usage history as you like.


*** To delete your entire usage history obliterate the selected items "from the beginning of time."


>>> Delete Usage History Using Firefox.

1.Launch Firefox on the Firefox menu and select history and clear recent history.


2.Select time range in the clear recent history window.Select the appropriate time range and you can select anywhere from the last hour to everything.


*** To make a more specific selection for deletion click on the details menu in the clear recent history window and choose exactly what it is you wish to delete.


3.click clear now.


>>> Deleting Search History Using Registry Editor (Advanced Technique)

1.Open up your start menu and type in "regedit"into your search bar.press"enter"when finished.


2.Double-click on the "regedit"icon.wait until the program loads up.if prompted,press"continue"


3.Press "Control" and "F" to bring up the Find box. This will allow you to begin searching for specific registry files.


4.Type in "HKEY-CURRENT-USER\Software\microsoft"into the find box.click the plus icon once the result lists in the find box.


5.Go to "Internet Explorer" ? "Explorer Bars."


6.Locate the Default registry entry. It will have the word "Default" in its file name.


7.Right-click and delete all registry entries below the Default registry entry. Be sure not to delete the Default registry entry or any entries above the Default, as this may seriously compromise your system's ability to perform certain functions.


PakarPC No 23-1, Block A, No 2 Jalan Langkawi 53300 Setapak Kuala Lumpur FB:facebook.com/thepakarpc Hotline:1800-88-7508

Thursday 1 August 2013

IP address

Every computer that communicates over the Internet is assigned an IP address that uniquely identifies the device and distinguishes it from other computers on the Internet. 

IP address is short for Internet Protocol (IP) address. 


An IP address is an identifier for a computer or device on a TCP/IP network. Networks using the TCP/IP protocol route messages based on the IP address of the destination.  

The Format of an IP Address 
  • The format of an IP address is a 32-bit numeric address written as four numbers separated by periods. Each number can be zero to 255. For example, 1.160.10.240 could be an IP address.
  • Within an isolated network, you can assign IP addresses at random as long as each one is unique. However, connecting a private network to the Internet requires using registered IP addresses (called Internet addresses) to avoid duplicates.
  • An IP address can be static or dynamic. A static IP address will never change and it is a permanent Internet address. A dynamic IP address is a temporary address that is assigned each time a computer or device accesses the Internet. 
What is My IP Address?

To view your IP address you can use the ipconfig (IPCONFIG) command line tool.  Ipconfig displays all current TCP/IP network configuration values and refreshes Dynamic Host Configuration Protocol (DHCP) and Domain Name System (DNS) settings.


To launch the command prompt from a Windows-based computer click:  
Start > All Programs > Accessories > Command Prompt. Type ipconfig and hit enter.

If you want to study more information about the IP address .visit to this page from here you can study How to quickly look up your IP Address in OS X {click here}

The four numbers in an IP address are used in different ways to identify a particular network and a host on that network. Four regional Internet registries -- ARIN, RIPE NCC, LACNIC and APNIC-- assign Internet addresses from the following three classes:

Class A - supports 16 million hosts on each of 126 networks
Class B - supports 65,000 hosts on each of 16,000 networks
Class C - supports 254 hosts on each of 2 million networks

The number of unassigned Internet addresses is running out, so a new classless scheme called CIDR is gradually replacing the system based on classes A, B, and C and is tied to adoption of IPv6. In IPv6 the IP address size is increased from 32 bits to 128 bits.


PakarPC No 23-1, Block A, No 2 Jalan Langkawi 53300 Setapak Kuala Lumpur FB:facebook.com/thepakarpc Hotline:1800-88-7508

How to quickly look up your IP address in OS X


IP Address is generally two relevant IP addresses that your computer is using now. The first is the LAN IP is address, configured directly on your system, which is the private IP address that computers and devices use to communicate when behind a router (such as that at your home). The second IP Adrress is the public IP address issued by your Internet service provider, and can usually be used either directly on your system or with a router.

But in most cases, private IP addresses are set up by a router to establish a protected network for computers and other devices and are not directly accessible from the Internet but are used extensively for device-to-device communication in your home or office. There got few ways to look up to your private IP Address you can go to the Network preferences pane in your Mac and select your active network connection.

When you do so, the main window will show the IP address currently assigned to that connection or also using this following steps commands for both Wi-Fi and Ethernet connections: 

networksteup.getinfo Wi-Fi
networksetup.getinfo Ethernet 


A publicly accessible IP will be the one issued by your ISP, and it allows you to contact your home network from remote locations.This IP address is generally configured in a router (not in your computer), and therefore connections to your computer using it will require proper routing and forwarding configurations in your router.

If you need to look up your router's public IP address, you can do so in several ways beyond going to your router's configuration.The easiest way to look it up is to perform a Google search for the term "IP" or "my IP address" (click here). The search results will show your public IP address as the first entry.


or

*Searching for the term "IP" or "my ip address" in Google will reveal your current public IP address.

Some third-party utilities that you can install will look this up and keep you informed if it changes.


PakarPC No 23-1, Block A, No 2 Jalan Langkawi 53300 Setapak Kuala Lumpur FB:facebook.com/thepakarpc Hotline:1800-88-7508